Disclosure: The links in this post may be affiliate links. If you purchase any products after clicking on these links, at no additional cost to you, Seeds for Generations may receive a small commission for making you aware of these important resources.
When to Tap Maple Trees for Syrup Production
The best time to tap a maple tree is typically in late winter or early spring when the temperatures start to rise above freezing during the day but still drop below freezing at night. This fluctuation in temperatures helps stimulate sap flow in the trees. We started tapping trees in February, with temperatures hovering around 40s and 50s during the day and 20s at night. That means the sap’s runnin’ and it’s syrup-making season!

What Do You Need for Tapping Maple Trees?
Materials needed:
- Maple trees (preferably sugar maples)
- Plastic spouts (spiles)
- Plastic tubing
- Drill with appropriate bit size
- Hammer
- 5-gallon food grade buckets (one per tree, plus extra for collection)
- Lids for buckets
- Metal pans or pots for evaporating the water out of the sap
- Method for heating and evaporating containers of sap – see our setup below
- Large pot and stove
- Candy thermometer
- Filters or cheesecloth
- Filter stand
- Food-grade funnel
- Bottles or Mason jars w/lids
Steps to Tap Maple Trees for Syrup Production

Choosing & Tapping Maple Trees for Syrupmaking
Identify healthy maple trees, preferably sugar maples as they have higher sugar content in their sap. Other types of maple trees, like red or black maple trees, can also be used, though their sap may require more boiling to reach the desired syrup consistency. While maple sap is most commonly known for making syrup, you can also tap birch, hickory, black walnut, and sycamore trees using much the same process.
Choose trees that are 12″ in diameter at breast height (DBH) or larger when measured in front of you (not base of the trunk). Look for bright, clean wood and avoid decayed or discolored places that may have mold or disease. From year to year, you also want to be careful to space out your tap holes, so you’re not drilling into the same places year after year.
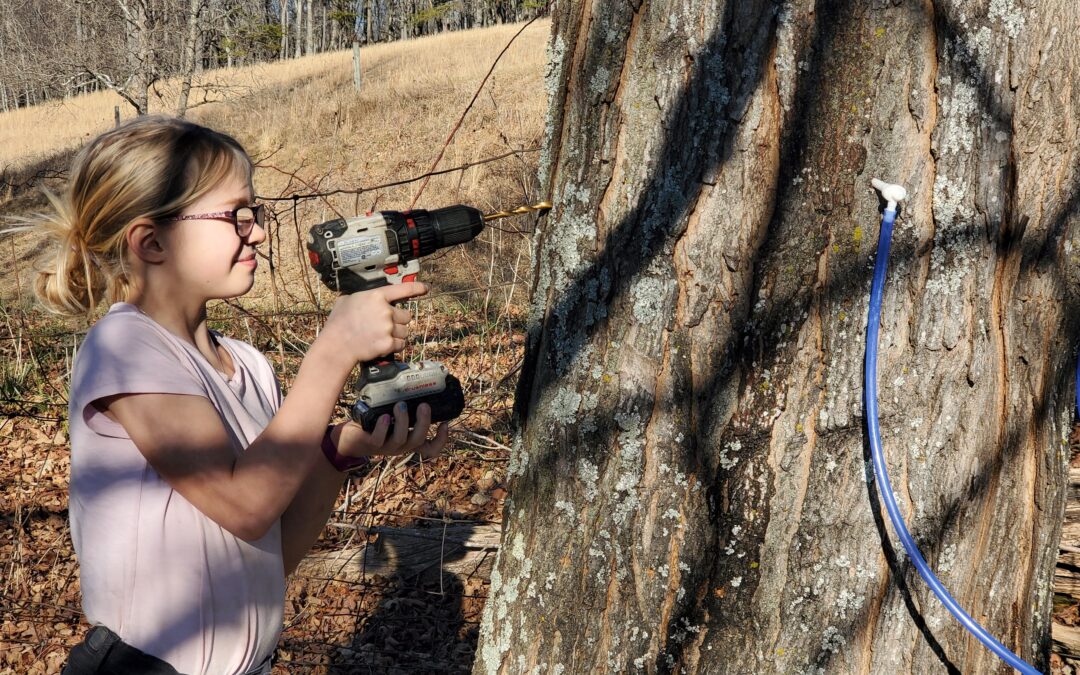
Using a drill with an appropriate bit size, drill a hole at a slight upward angle into the tree, about 2-2.5″ deep. (The upward angle helps the sap run more smoothly out of the tree) For trees that are 12-18″ in diameter, use one tap hole per tree. For larger trees, you can put up to two tap holes, but don’t place no more than 2 tap holes per tree. Pressure needs to build up in the tree to push the sap out, and the more holes and broken branches you have, the less pressure there will be.

Inserting Plastic Taps & Tubing for Collecting Maple Sap
Once you’ve drilled the tap holes, gently hammer the plastic taps into the holes until snug. Don’t do this too hard or you could split into the wood, which you don’t want. Make sure the taps are secure to prevent leaks. Connect the tubing to the taps, ensuring a tight fit. The tubing should lead to a collection container such as a 5-gallon bucket with a lid. Drill a hole slightly larger than your tubing diameter in the lid so that you can insert the tubing into the bucket without bugs being able to crawl inside. Make sure you have enough tubing so the sap can flow easily into your containers. Most of our tubing from our taps is 2-4 feet long, sometimes longer if we’re collecting from multiple trees into a single bucket.
For 7/16″ spouts, you want to insert them no more than 2.5″ deep into the tree. For smaller spouts, don’t drive them deeper than 1.5″. We use 5/16″ plastic spouts.

Collecting Maple Sap for Making Syrup
Place the collection containers under the taps to gather the sap dripping from the trees. Check and empty the containers regularly, daily if possible, to prevent spoilage and leakage. We have had a bucket that overflowed because we didn’t check it daily and the sap was running so heavy!
In our experience, we generally get about 1.5 to 2.5 gallons per tap per day when the conditions are good for an ideal sap run. I had a complete extra set of buckets just for collection and storage, aside from the ones at the trees, so I could collect daily and only have to boil once I had most of my buckets full.

Once collected, store the sap in a cool place until you’re ready to boil down your sap into syrup. If it gets well below freezing at night, ice will likely form in the tops of the buckets, and you can remove this in the morning to help remove water and thereby increase sugar concentration even before you begin boiling.

Boiling Sap into Maple Syrup
Once the sap is collected, it needs to be boiled to evaporate the water and concentrate the sugars. This is traditionally done in a sugar house using a large evaporator, although smaller-scale operations may use a stove or outdoor fire like we do. In the pictures, you can see that we built our own outdoor evaporator using cinder blocks and a metal stovepipe, with stainless steel restaurant pans of sap on top of the wood fire.


If you’re looking to make a much larger or more professional setup, like one using vacuum lines, the University of New Hampshire has a helpful article you can reference here. This is a good to review even for smaller setups like ours.
Boiling maple syrup happens in two stages:

First, you’re boiling off as much of the moisture as possible. This is a steamy, smoky boil outdoors. The sap hasn’t been filtered and isn’t anywhere near a syrup-like consistency yet. The pans and fire require continual attention, and wood fuel needs to be added regularly (every 30-60 minutes at least until you get a thick bed of coals built up). We generally boil our sap outdoors for 3-5 hours for each 20-30 gallon batch.

Once you’ve boiled off as much moisture as possible and the sap has reduced significantly, it’s time for the “finishing boil”, which is typically done indoors on the stove. Before you remove the sap to bring it indoors, you are looking for an amber liquid that has increased in viscosity (the bubbles move and pop slower) compared to earlier in the process.
- Start by filtering the reduced sap with a fine mesh sieve to remove any impurities like ash.
- On medium heat, boil the syrup until it registers at 3 degrees F above the boiling point of water. (At 2,500ft elevation where we live, water boils at 207.5 degrees F.)
- Once it reaches 3 degrees F above your boiling point, filter the syrup again using a synthetic filter or multiple layers of cheesecloth. This fine filtering is done to remove “sugar sand” that precipitates out of the syrup as you boil out the water.
- Bring the syrup back to a boil, this time until it reaches 7 degrees F above the boiling point. It should be much darker and noticeably thicker. If you want thicker syrup, can you slightly reduce the heat level and keep the temp about 6 degrees above boiling point until you remove enough water to reach your desired viscosity. Now it is done! (If you keep boiling the syrup too long or let the temp climbs too much, it will start crystalizing.)
- Let the syrup cool to 180 to 190 degrees F before filtering one last time and bottling in dry, sterilized jars or bottles. If using canning jars, top with clean lids and let the jars seal as the mixture cools. If you don’t filter a couple times, especially this last time, you will likely end up with very fine sugar sand particulate in the bottom of your containers.

Filtering the first time.

Filtering the last time.

FAQs About Making Maple Syrup
What Time of Year Do You Tap for Maple Syrup?
The ideal time of year to tap for maple syrup is during the late winter to early spring months, typically between February and March in most places.
How Many Gallons of Sap Does It Take to Make One Gallon of Maple Syrup?
It typically takes around 40 gallons of sugar maple sap to produce one gallon of maple syrup. This ratio can vary depending on factors such as the sugar content of the sap, tree species, boiling temperature, and personal preference for the syrup’s thickness. Maples other than sugar maples are closer to 50:1 and other species can be up to 60:1.
What Happens If You Tap a Maple Tree That’s Too Small? Does Collecting Maple Sap Hurt the Tree?
If you tap a maple tree that is too small, it can cause harm to the tree and potentially affect its health and growth. Tapping a tree that is not mature enough or lacks sufficient size can lead to reduced sap flow, weakening of the tree’s overall structure, and increased vulnerability to diseases and pests.
Collecting maple sap does NOT hurt the tree, however, when done properly and responsibly. When sap is collected following best practices like using appropriate tapping techniques, tapping only mature trees, and not over-tapping a tree, the process is sustainable and does not cause long-term harm to the tree. Maple trees have the ability to regenerate sap and heal from tap holes each year, allowing them to continue producing sap for many decades, as they have for years before.

Enjoying Homemade Maple Syrup
Maple syrup is graded based on color and flavor intensity, from the light and delicate Grade A to the robust and dark Grade B. Now that you have your own homemade maple syrup, you can enjoy it on pancakes, waffles, or any other dish you desire! And its uses go far beyond breakfast. It can be used as a sweetener in baking, marinades, dressings, and even cocktails, adding a unique depth of flavor to any dish. And it tastes amazing!
Concluding Thoughts on Making Maple Syrup
Tapping maple trees for syrup production is a fun and rewarding activity that is something for the whole family to enjoy. By following these steps and using plastic taps and tubing to collect sap into 5-gallon buckets, then boiling it down into syrup, you can experience the sweet taste of pure maple syrup made right in your own backyard…without planting anything new!