Growing your own garlic can be incredibly rewarding. Fresh garlic tastes and smells amazing, far better than the bottle of garlic powder in your spice cabinet, plus it has reported medicinal uses as well.
Garlic is usually planted in the fall, allowed to overwinter, grown through the spring, and then harvested in the late spring or early summer. Technically a perennial, it needs cold winter temperatures to form bulbs.
Once you’ve planted your garlic cloves in the ground, how do you care for garlic plants from winter into spring and summer? What does seed garlic need to thrive in the garden? Let’s find out!

Planting Seed Garlic: A Quick Review
Let’s do a quick rundown of how to plant garlic first, in case you’re unfamiliar with the process.
In the fall, at least 2 weeks before your first fall frost, gently separate cloves from the bulb. Do NOT remove their paper skins.
Plant garlic cloves with the pointed ends facing up. You’ll want to place each clove 1-2″ deep in mild climates or 2-4″ deep in colder climates, with cloves 6″ apart and rows 12″ apart. (If you’re growing Elephant garlic, it needs planted 12″ apart in rows 24″ apart instead, because of its giant size.)
How to Care for Garlic Plants

How to Mulch Garlic in the Winter
Since your garlic will remain in the ground all winter long, it needs protection from hard winter cold. Mulch your garlic plants with 4-8″ of straw or another type of mulch. (If you live in a very harsh winter climate, use the larger amount. If you live in a milder climate, you can get away with less mulch.)
Pull back the mulch from the plants in the spring, to prevent too much moisture from getting trapped.

How Much Water to Give Garlic Plants
Compared to other garden crops, garlic doesn’t need much water. The soil should remain moist underneath, but not soggy. (Too much water makes garlic rot.) Water as needed throughout the growing process, stopping a week or two before harvest.
How to Fertilize Garlic Plants
Avoid fertilizing your garlic in the fall/winter – too much fertilizer will cause quick growth too early. In the spring and summer, however, you can add amendments like aged manure, compost, worm castings, or another high-phosphorous fertilizer to feed your garlic plants. Sulfur is another of the important nutrients garlic plants need.

How to Care for Garlic Plants in the Spring
As the soil warms, your garlic plants will begin growing again, with tall, green leaves stretching towards the sky. As the garlic grows, keep up with the weeds, which can compete with the garlic for nutrients and sunlight. (Controlling weeds also helps with pest and disease control in the garden.)
If you’re growing hardneck or elephant garlic, you’ll also notice a curly, stem-like “leaf” coming out of the middle of the plant. This is called a “scape” and it’s the start of the garlic flower. You’ll want to snip this off the garlic, to direct all of its energies towards developing garlic bulbs for harvest. Don’t waste these – they can be prepared similar to asparagus but with garlic flavor – absolutely delicious!

How to Harvest Garlic
Let the garlic grow until half of the leaves have turned yellow/brown, dying away. At this time, the garlic is ready to harvest!
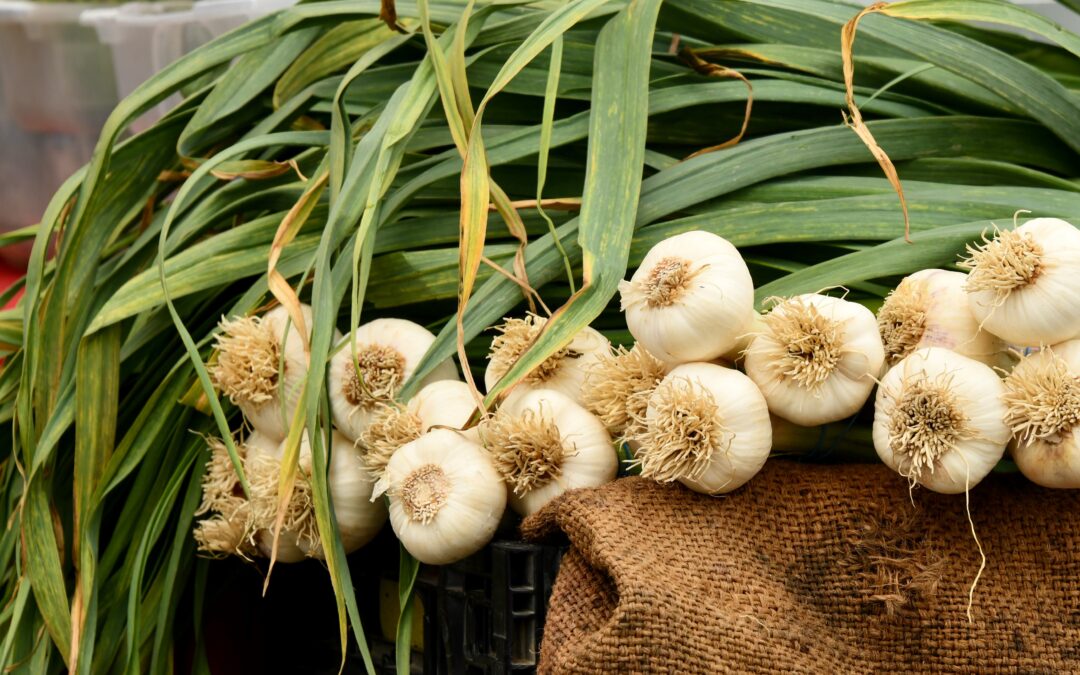
Gently dig or pull garlic and brush off the dirt before curing.
Garlic should cure in a dark, dry place for at least 30 days before being used or put in storage. Curing helps it store better and also develops the garlic flavor. Most gardeners will hang the garlic in bunches or spread it over an airy surface to cure. Once cured, your garlic is ready for use!
Save back some of your best bulbs for planting again in the fall if you’d like, to repeat the process. Now that you know how to care for garlic plants, you should be set.